Creating and managing IAM (Identity and Access Management) users in AWS (Amazon Web Services) is a fundamental part of securing and organizing your cloud infrastructure. IAM users help control access to your AWS resources and ensure the right people have the right permissions. In this guide, you’ll learn step-by-step how to create a new IAM user with necessary permissions.
An AWS admin can grant a user full access on Amazon Simple Storage Service or Amazon Elastic Compute Cloud only. This security approach is more transparent and consistent than individually configured account access.
Step 1: Sign in to AWS Management Console
- Go to the AWS Management Console: Open your web browser and go to AWS Management Console.
- Sign in with your credentials: Use your AWS account credentials to sign in. If you don’t have an account, you can create a new one by following the sign-up process.
Step 2: Navigate to the IAM Service
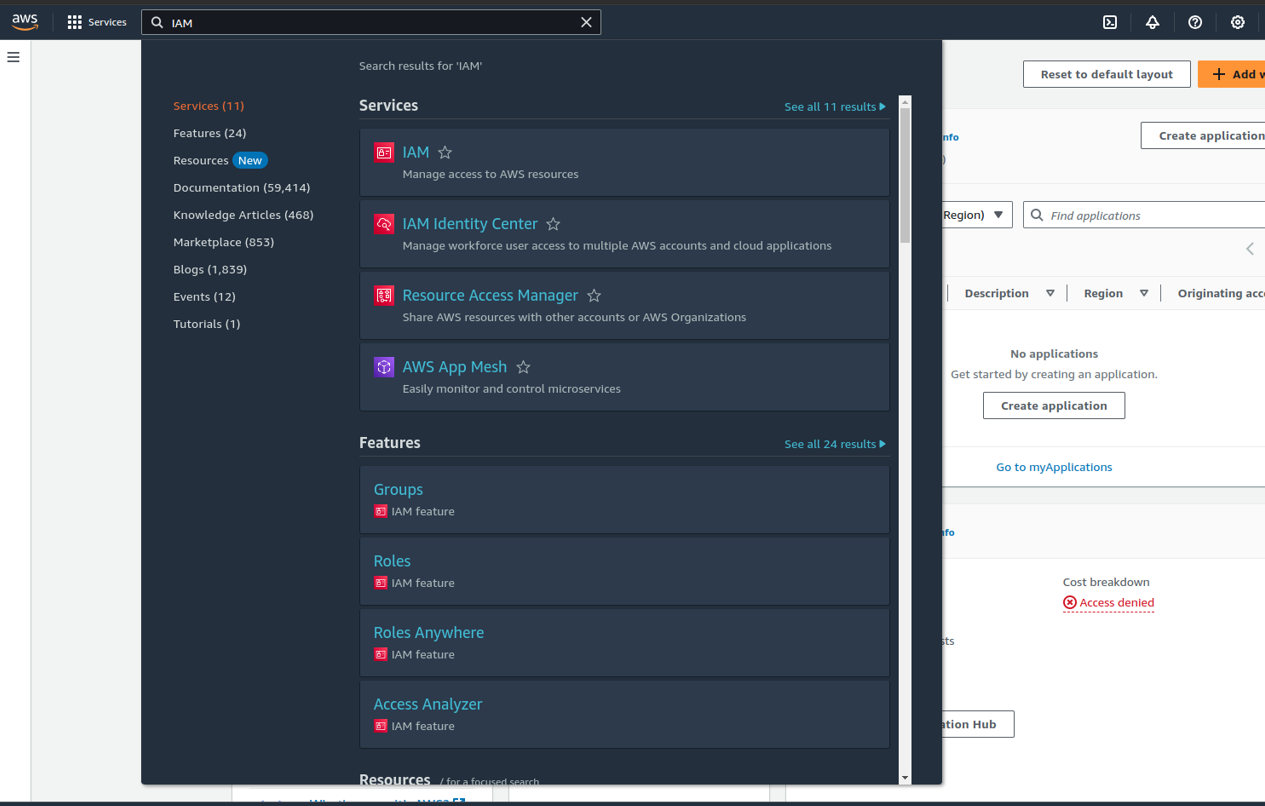
- Search for IAM: In the AWS Management Console, type “IAM” in the search bar at the top.
- Select IAM Service: Click on the IAM option in the search results to open the IAM dashboard.

3: Add a New User
To create a user in AWS, we fill out a form and receive an access ID and secret key. At this step, we create a user named cli-user with full access permissions and programmatical access. This user is how we will manage other users later.
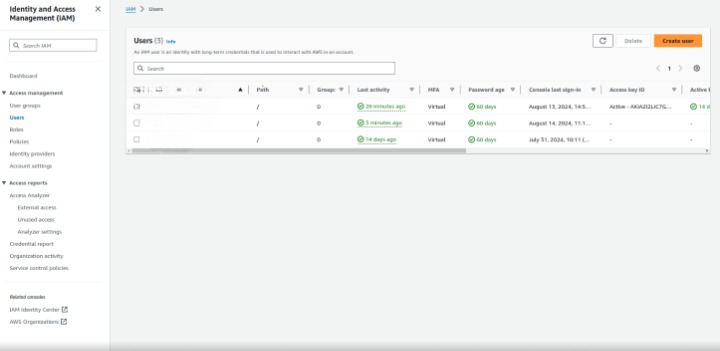
- In the IAM dashboard, click on Users located on the left sidebar.
- Click the Add user button at the top of the page.

4: Set User Details
- User Name: Enter a unique name for the new IAM user. This name will help you identify the user later.
- Access Type:
- Programmatic access: Check this option if the user needs to access AWS resources using the AWS CLI, SDKs, or APIs.
- AWS Management Console access: Check this option if the user needs to log in to the AWS Management Console. You can set a
custom password or allow AWS to generate one.
5: Set Permissions
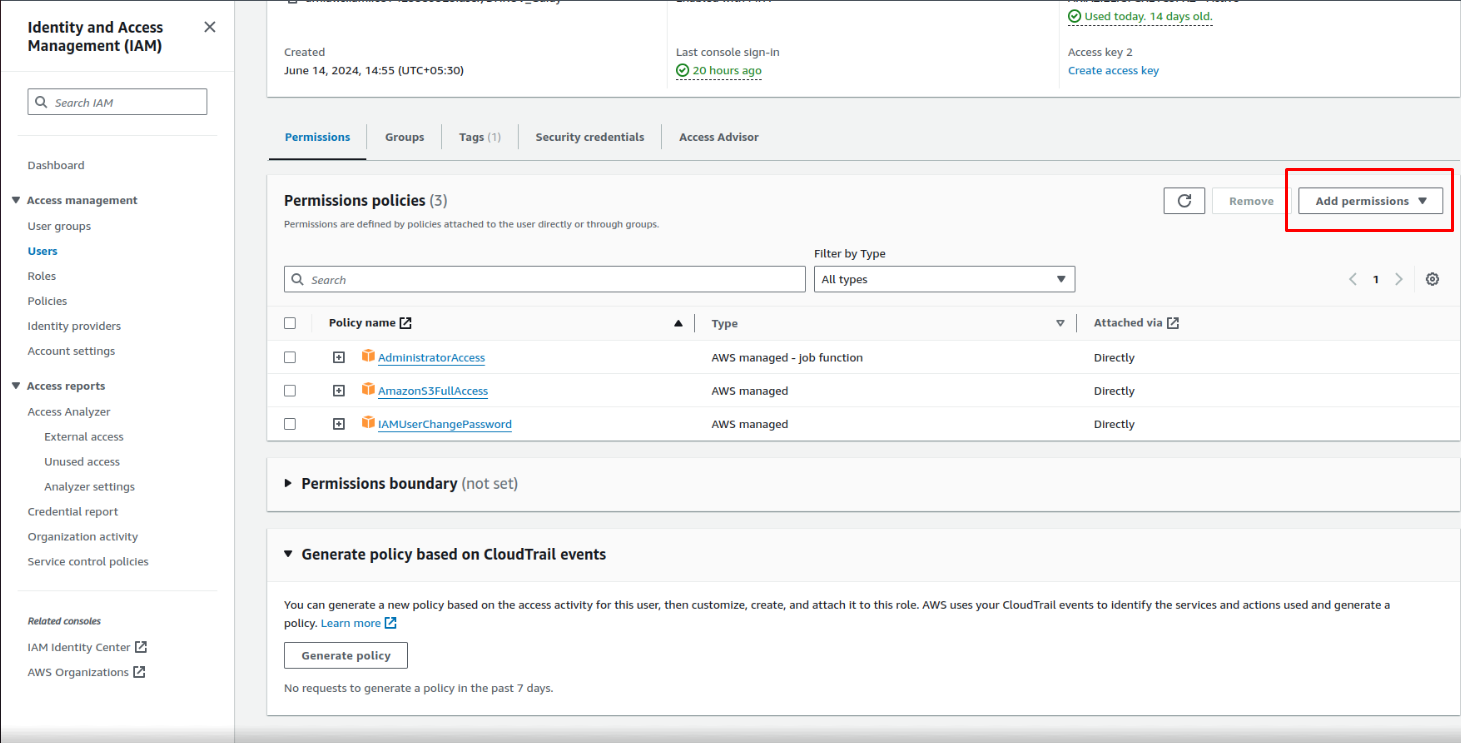
Assigning permissions is a critical step in ensuring that the IAM user has the right access to perform their tasks:

- Add user to group: Select an existing group to assign permissions based on predefined policies.
- Attach policies directly: You can attach individual policies such as AmazonS3FullAccess, EC2ReadOnlyAccess, or any other predefined
AWS managed policies. - Copy permissions from existing user: If you have another IAM user with similar access needs, you can copy permissions from that user
6: Review and Create
Review all the details, including user name, access type, and permissions. If everything looks correct, click on the Create user button to proceed.
7: Download User Credentials
- On the confirmation page, download the .csv file containing the user’s access key ID, secret access key, and password (if
applicable). - Store this .csv file securely because it will be your only opportunity to access these credentials.
Note: If you enabled AWS Management Console access, provide the user with their username, password, and the login URL to access the console.
8: User is Ready
- The IAM user is now created and can start using AWS based on the permissions you assigned. Make sure to periodically review and update user permissions as needed to maintain a secure AWS environment.
For more detail you can write AWS Documentation
Summary
Creating a new IAM user in AWS is straightforward and essential for maintaining secure access to your cloud resources. By following these steps and best practices, you can effectively manage your AWS environment while ensuring security and compliance. IAM users play a crucial role in enforcing access controls, enabling you to implement the principle of least privilege and reduce security risks.
You may also find interesting:
Effortlessly Upload Images to AWS S3 in Laravel | Complete Step-by-Step Guide