Learn how to upload images to AWS S3 in Laravel using Laravel’s Storage API. This tutorial explains the complete process, from setting up your S3 bucket to configuring Laravel and uploading your files seamlessly.
Uploading images to AWS S3 in Laravel can significantly enhance file storage and management. AWS S3 is a robust, scalable cloud storage solution, and Laravel provides a seamless API to integrate S3 storage into your applications. In this tutorial, we’ll guide you through the steps of setting up AWS S3 and Laravel to handle image uploads efficiently.
Why AWS S3?
- Configurable permissions for secure file access.
- Scalability, allowing files between 0 bytes and 5 gigabytes.
Step 1: Install Laravel
To begin, set up a fresh Laravel project by running the following command in your terminal:
composer create-project --prefer-dist laravel/laravel upload-image-aws-S3Step 2: Create an S3 Bucket
2.1. Sign in to AWS Management Console
- Sign in to AWS Management Console: Log in to your AWS account.
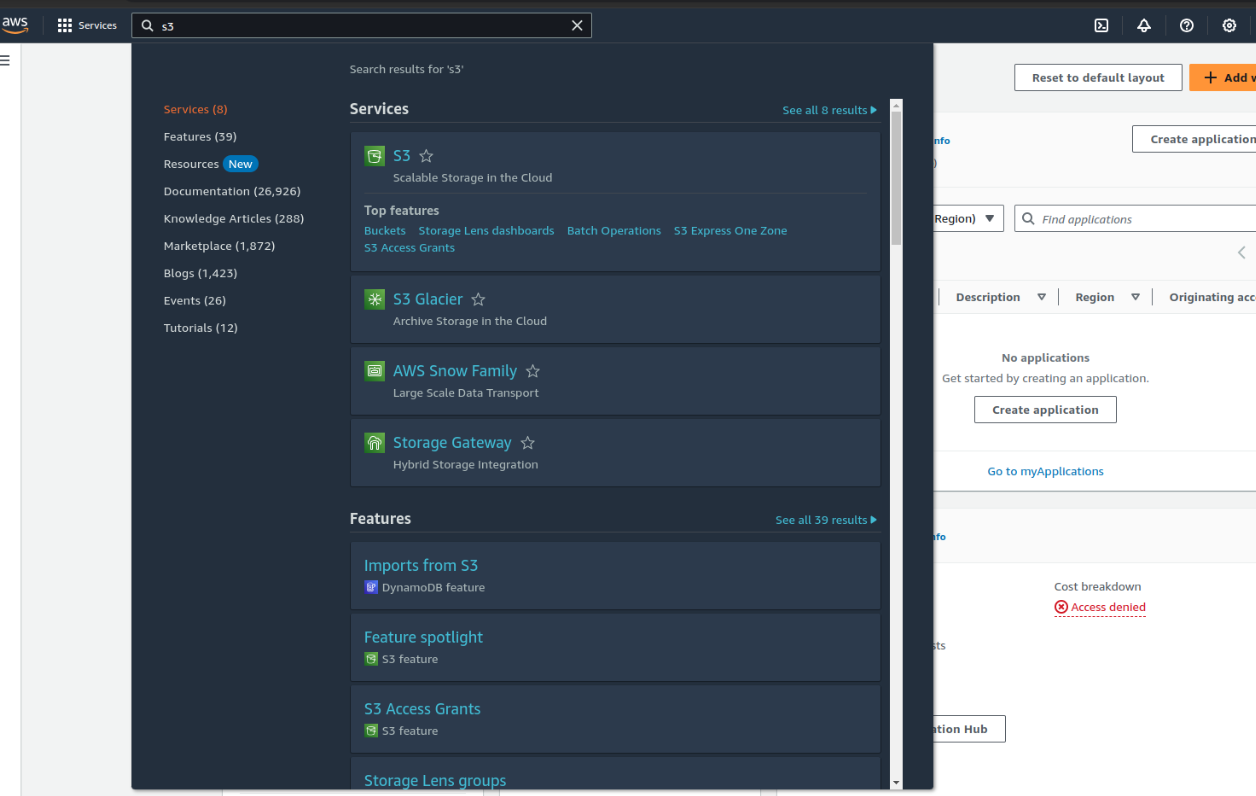
2.2. Open the S3 Service

- Open S3 Service: Search for S3 in the AWS search bar.
2.3. Create a New Bucket

- Create a New Bucket: Click “Create bucket,” provide a unique name, and choose your region.
- Provide a globally unique bucket name and select your desired AWS region.
2.4. Configure Bucket Settings
- Configure Bucket Settings: Leave the public access block enabled unless you want to make your bucket public.
- Enable Bucket Versioning and Tags as needed for easier management and organization.
2.5. Review and Create
- Review and Create: Finalize your settings and create the bucket
Note: Your bucket name must be globally unique across all AWS regions.
Step 3: Install AWS S3 Filesystem Package
Now, we need to install the S3 filesystem package to handle file uploads in Laravel. Run the following composer command:
composer require league/flysystem-aws-s3-v3Next, open the .env file in your Laravel project and add your AWS S3 credentials:
AWS_ACCESS_KEY_ID=your-access-key-id
AWS_SECRET_ACCESS_KEY=your-secret-access-key
AWS_DEFAULT_REGION=your-region
AWS_BUCKET=your-s3-bucket
Note: If you’re running your web app without HTTPS, add ‘scheme’ => ‘http’ to your config/filesystems.php under the ‘s3’ array to avoid SSL certificate errors.
Step 4: Create Routes
Define the necessary routes in the routes/web.php file to handle image uploads:
use Illuminate\Support\Facades\Route;
use App\Http\Controllers\ImageUploadController;

Route::get('image-upload', [ImageUploadController::class, 'imageUpload'])->name('imageUpload');
Route::post('image-upload', [ImageUploadController::class, 'store' ])->name('store');
Step 5: Create ImageUploadController
Generate the controller for handling image uploads using the following Artisan command:
php artisan make:controller ImageUploadControllerNow, open the newly created app/Http/Controllers/ImageUploadController.php and add the logic for handling file uploads to AWS S3:
namespace App\Http\Controllers;

use Illuminate\Http\Request;
use Illuminate\Support\Facades\Storage;

class ImageUploadController extends Controller
{
    public function imageUpload()
    {
        return view('image-upload');
    }

    public function store(Request $request)
    {
        $request->validate([
            'image' => 'required|mimes:jpeg,png,jpg,gif,svg|max:2048',
        ]);

        $imageName = $request->image->getClientOriginalName();
        $imagePath = 'uploads/' . $imageName;

        $path = Storage::disk('s3')->put($imagePath, file_get_contents($request->image));
        $path = Storage::disk('s3')->url($path);

        return back()->with('success', 'Image uploaded successfully!');
    }
}
Step 6: Create the Blade View for Image Upload
Create a Blade template to handle the image upload form. Save the file as resources/views/image-upload.blade.php:
<!DOCTYPE html>
<html>
   <head>
      <title>How to Upload Image in AWS S3 in Laravel</title>
      <link rel="stylesheet" href="https://maxcdn.bootstrapcdn.com/bootstrap/4.0.0/css/bootstrap.min.css">
   </head>
   <body>
      <div class="container">
         <div class="panel panel-primary">
            <div class="panel-heading">
               <h2>Laravel Image upload in AWS S3 bucket</h2>
            </div>
            <div class="panel-body">
               @if ($message = Session::get('success'))
                   <div class="alert alert-success alert-block">
                      <button type="button" class="close" data-dismiss="alert">×</button>
                      <strong>{{ $message }}</strong>
                   </div>
               @endif

               @if (count($errors) > 0)
               <div class="alert alert-danger">
                  <strong>Whoops!</strong> There were some problems with your input.
                  <ul>
                     @foreach ($errors->all() as $error)
                     <li>{{ $error }}</li>
                     @endforeach
                  </ul>
               </div>
               @endif

               <form action="{{ route('store') }}" method="POST" enctype="multipart/form-data">
                  @csrf
                  <div class="row">
                     <div class="col-md-6">
                        <input type="file" name="image" class="form-control"/>
                     </div>
                     <div class="col-md-6">
                        <button type="submit" class="btn btn-success">Upload File...</button>
                     </div>
                  </div>
               </form>
            </div>
         </div>
      </div>
   </body>
</html>
Step 7: Run the Laravel Application
Now that everything is set up, run the Laravel application using:
php artisan serve Visit the route /image-upload in your browser to upload images to AWS S3.
For more in-depth Laravel tutorials and best practices, check out Laravel’s official documentation.
Summary
Uploading images to AWS S3 with Laravel is straightforward and provides powerful cloud storage capabilities. By leveraging the scalability of AWS and the ease of Laravel’s Storage API, you can efficiently manage large file uploads in your applications.
You may also find interesting:
Find the Nearest Location Using Latitude and Longitude in Laravel – Effortless 2024 Guide